Post processing can be a tiny step, or the biggest part of a photographic project. It's important to find your rhythm and style to dial in your approach to post processing.
I do all my RAW photo editing in Adobe Lightroom Classic with the Adobe Photography Plan for $20/month.
Graphic design projects like posters are done in Adobe Photoshop.
Camera RAW
AFTER Post Processing
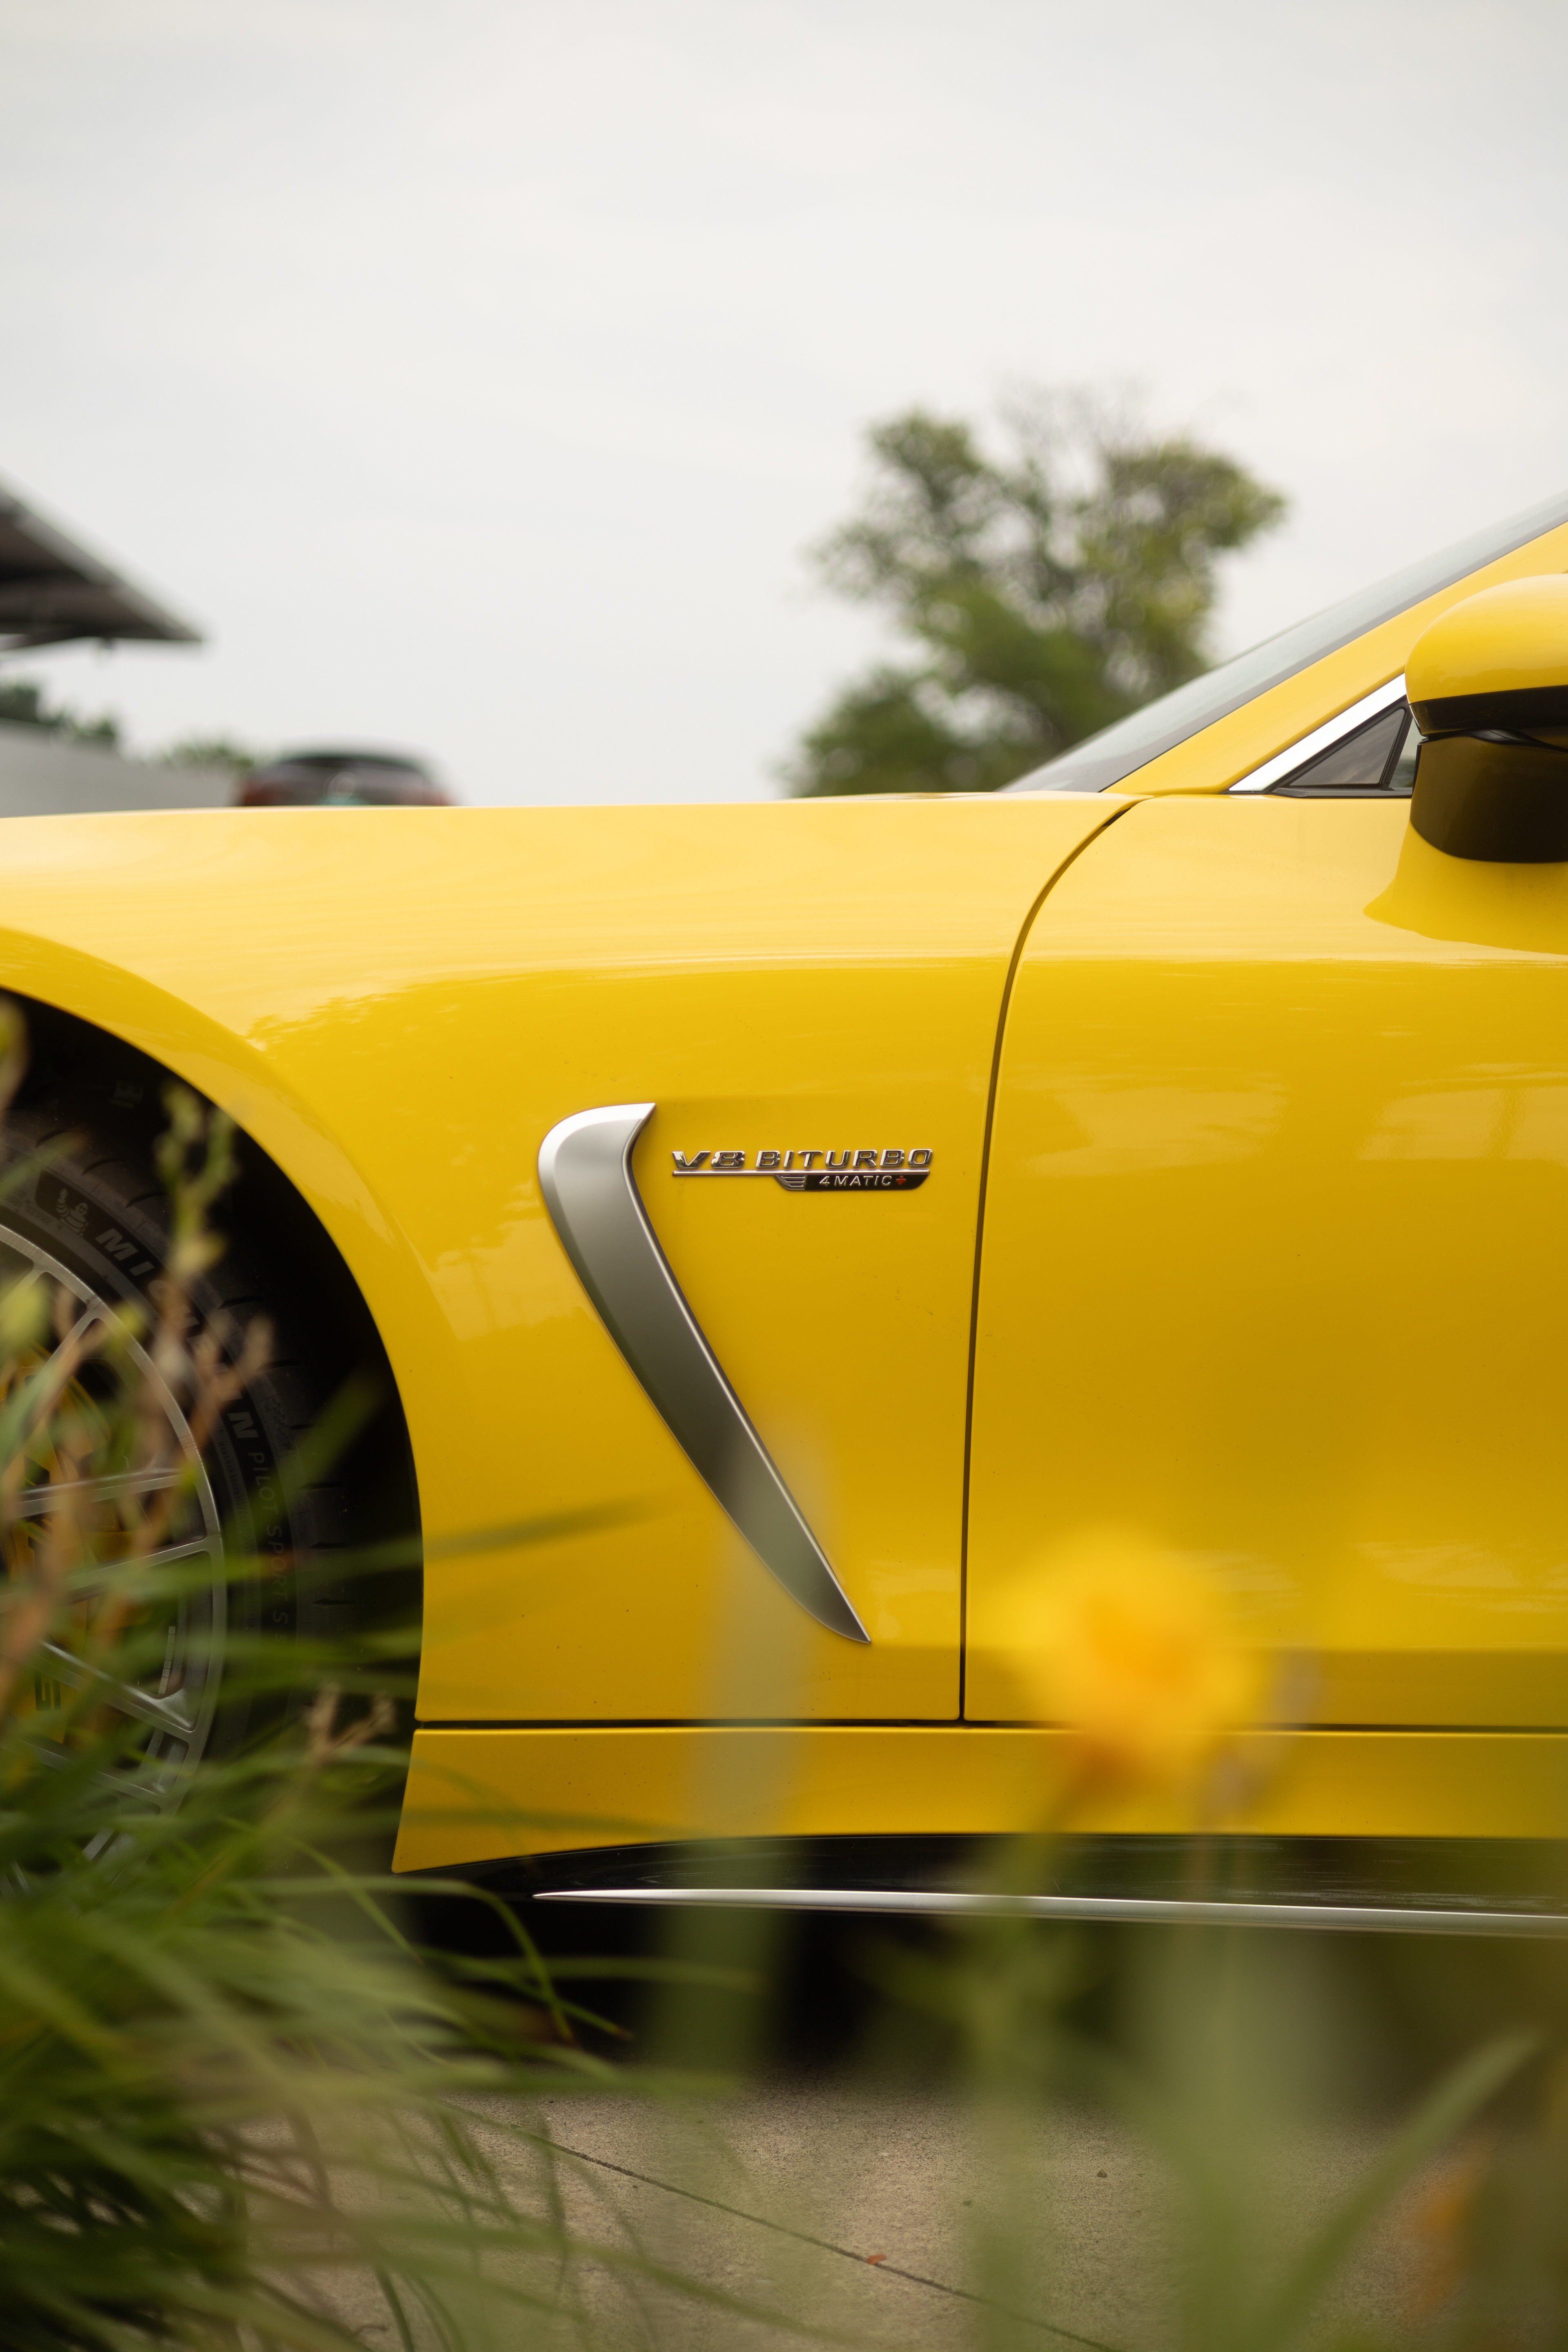

These photos are from my most recent set at Mercedes-Benz of North Olmsted in Cleveland, Ohio. July 9th, 2025.
SETTINGS

Generally, I'm not a huge fan of dragging the highlights down, and the shadows up. While I understand it evens a photo and shows more detail in the highlights and shadows, it flattens the image and lacks depth in my opinion.
This photo is a good example on how I approach shadows and highlights. While my shadows are raised, its not uncommon for me to darken them further. It varies whether I adjust whites and blacks at all, typically I manage my extremes with my tone curve.
As for coloration, this is very standard for my editing. I prefer the vibrance down as it draws away from large flat color spaces, and preserves color near edges and enhancing depth and shape. Pulling the saturation up slightly offsets this look and keeps it even.
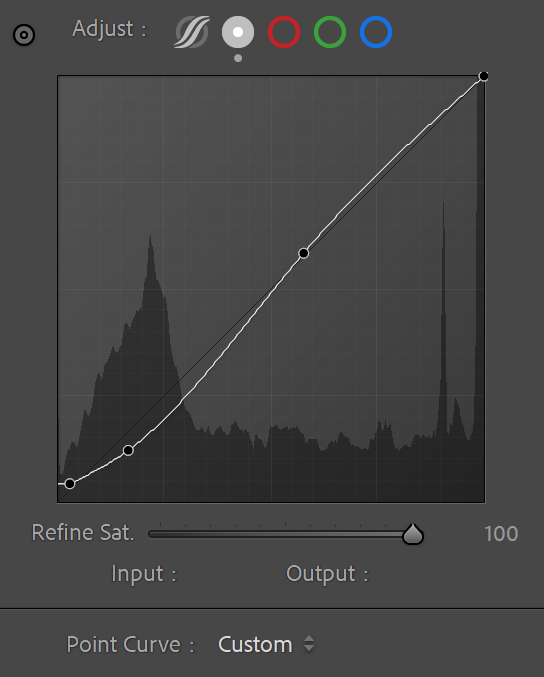
Typically, my tone curve adjustments are very modest. Shown here, the blacks are lifted up and brought in.
Black - 7, 11
Point 1 - 42, 31
Point 2 - 147, 149
White - 255, 255
I further enhance shadows with a standard S curve. I add a point near my mids to preserve them. In this case my whites and highlights are only adversely adjusted.

My color mixer is another section I do not adjust much. I will jump a little out of Lightroom Classic order and include Calibration as well, which is located at the very bottom in the develop panel.
Due to the color temperature and the calibration adjustments, I offset my orange slider more toward the yellow side as to preserve the cars authentic color. I lifted its saturation slightly as well.
These yellow shifting adjustments were necessary as the calibration adjustments moved the yellow of the car more to an orange hue, so I offset it.
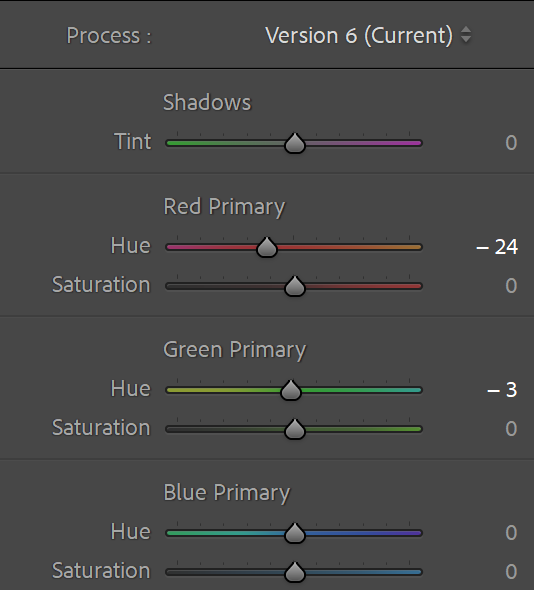
Calibration is a tool I use on almost every photo. It's not often I see it used. from my understanding, calibration adjustments aren't even provided in regular Lightroom.
The best way to describe what it is this:
Calibration is the base coat, HSL is the paint. When you adjust the calibration, you are shifting the hue of the RGB subpixels. The HSL adjusts the hue of the pixels.
This is a way oversimplification and may have some technical holes. But generally after my exposure, I use my calibration as rough adjustment, and tune it with my HSL sliders.
CROPPING AND MASKING

In my personal opinion. Composition is WAY overcomplicated and emphasized.
I do all my cropping with a centered subject.
No rule-of-thirds, no golden ratio. Just plain centering in every photo.

How I center my subject, does have a process though.
I will identify my subject first.
Next, I will grab the left or right edge, then hold the ALT key, which preserves the crop center, then slide the opposite edge of which I'm dragging to the edge of my subject.
Then, I will release the ALT key to preserve that edge, then slide the edge I am dragging to the subjects opposing edge.
I will rotate as needed, then hold ALT and drag my crop outward to the bounds of the photo.
I repeat this process for top and bottom.
Masking is a huge hot topic in auto photography it seems. I keep it simple and use it as a means of emphasizing highlights and bloom, as well as using linear gradients for shadows.
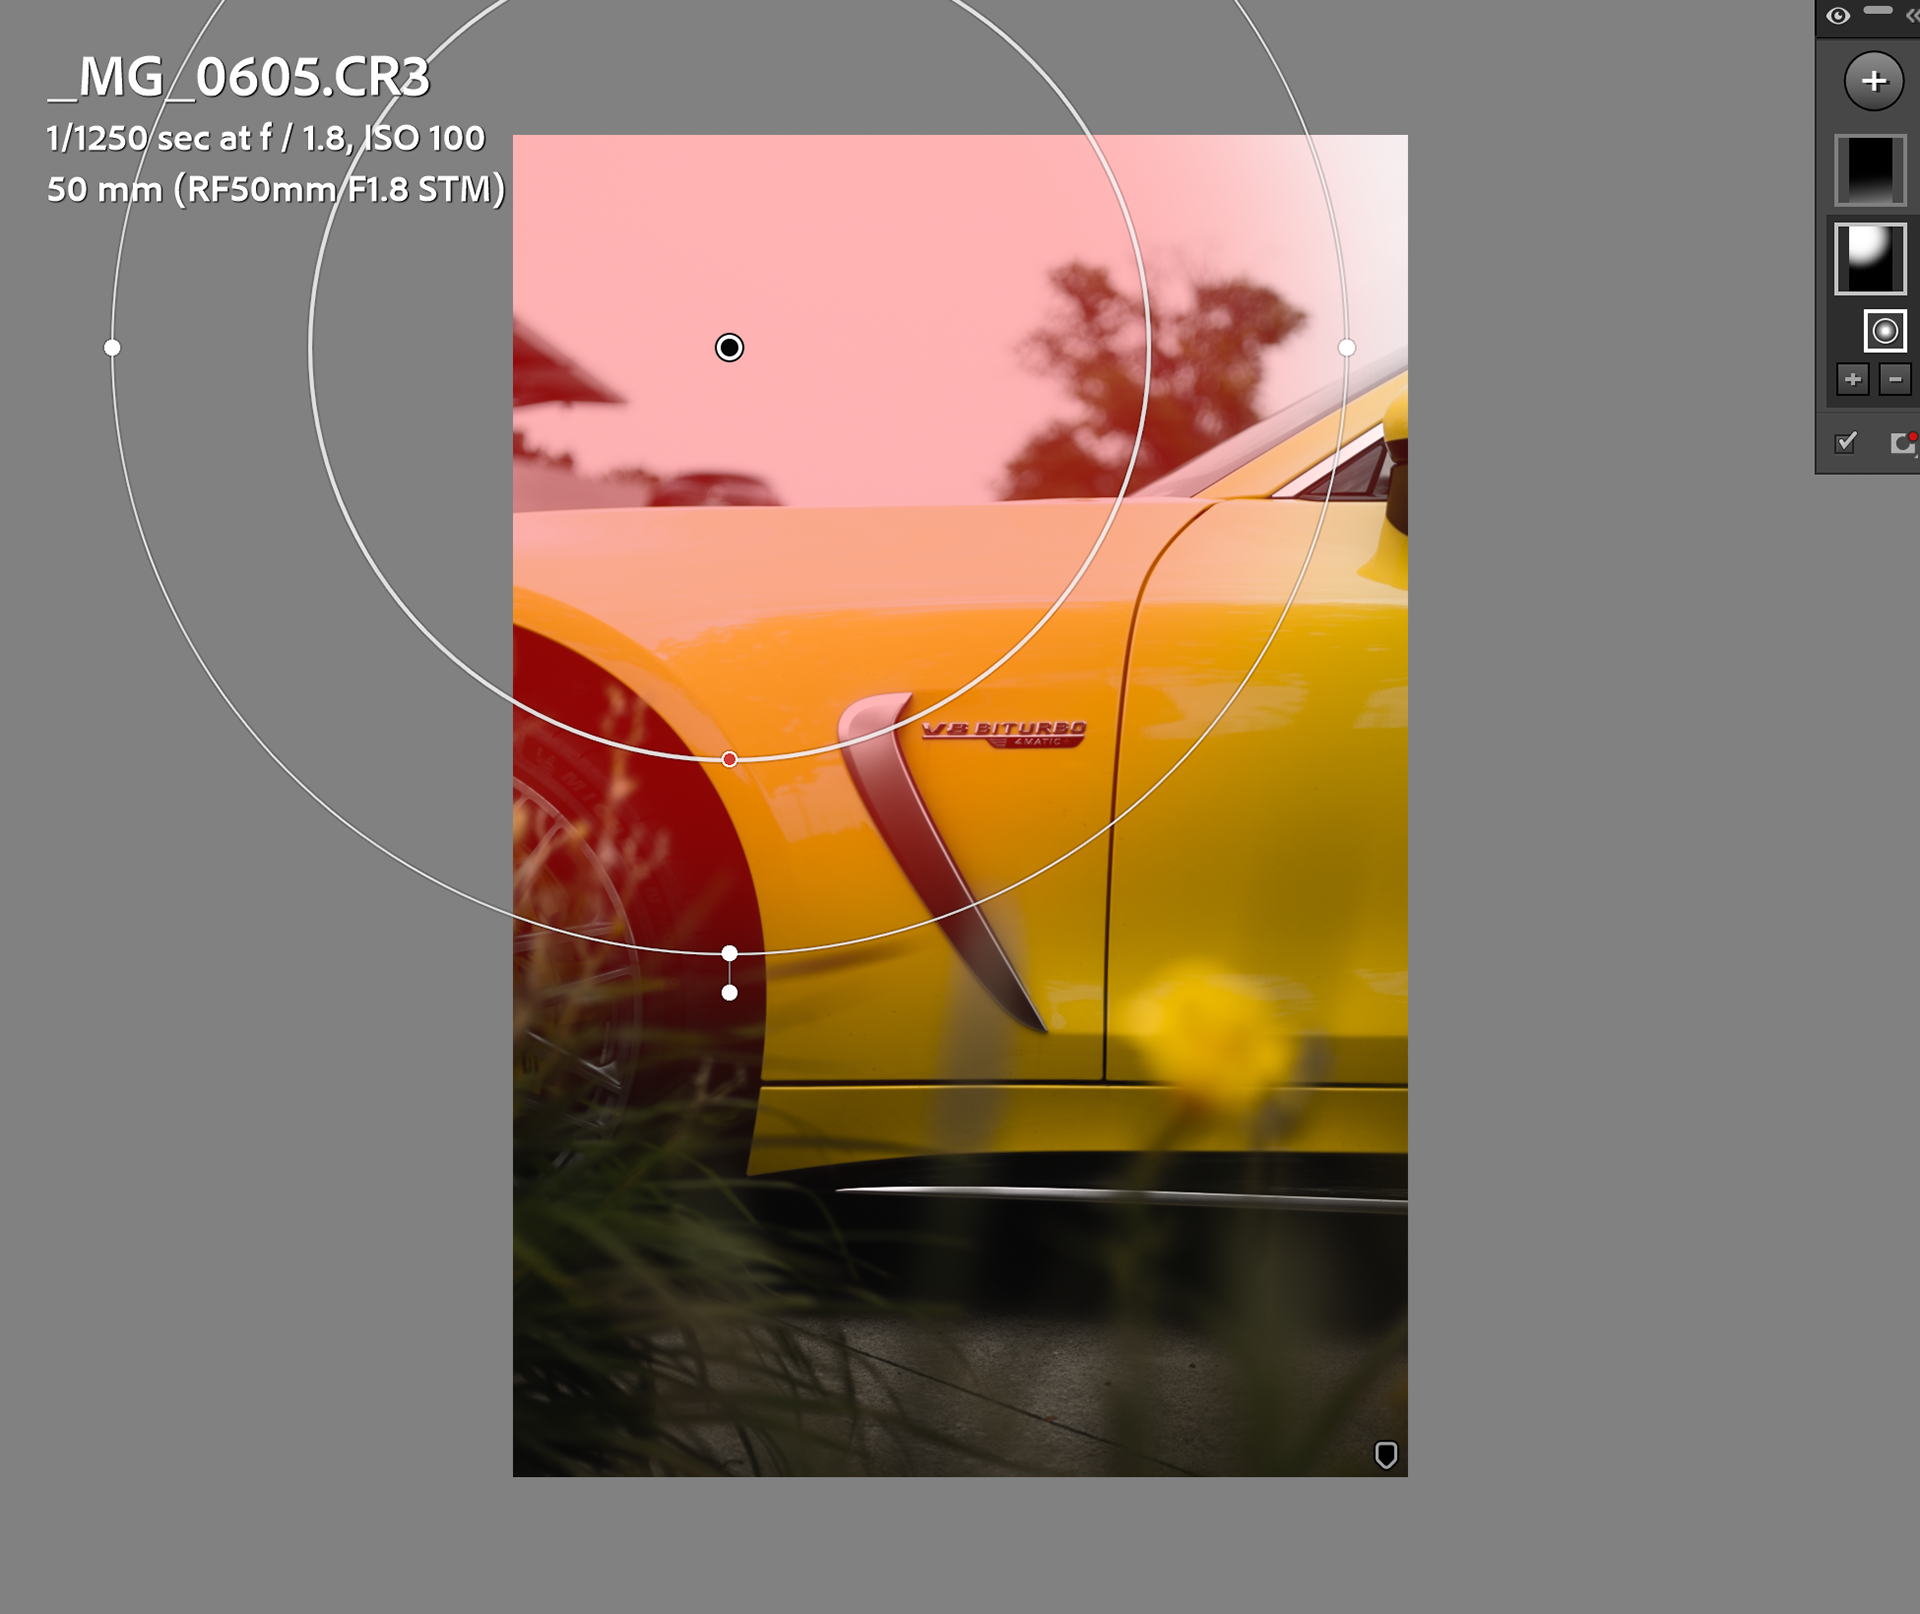
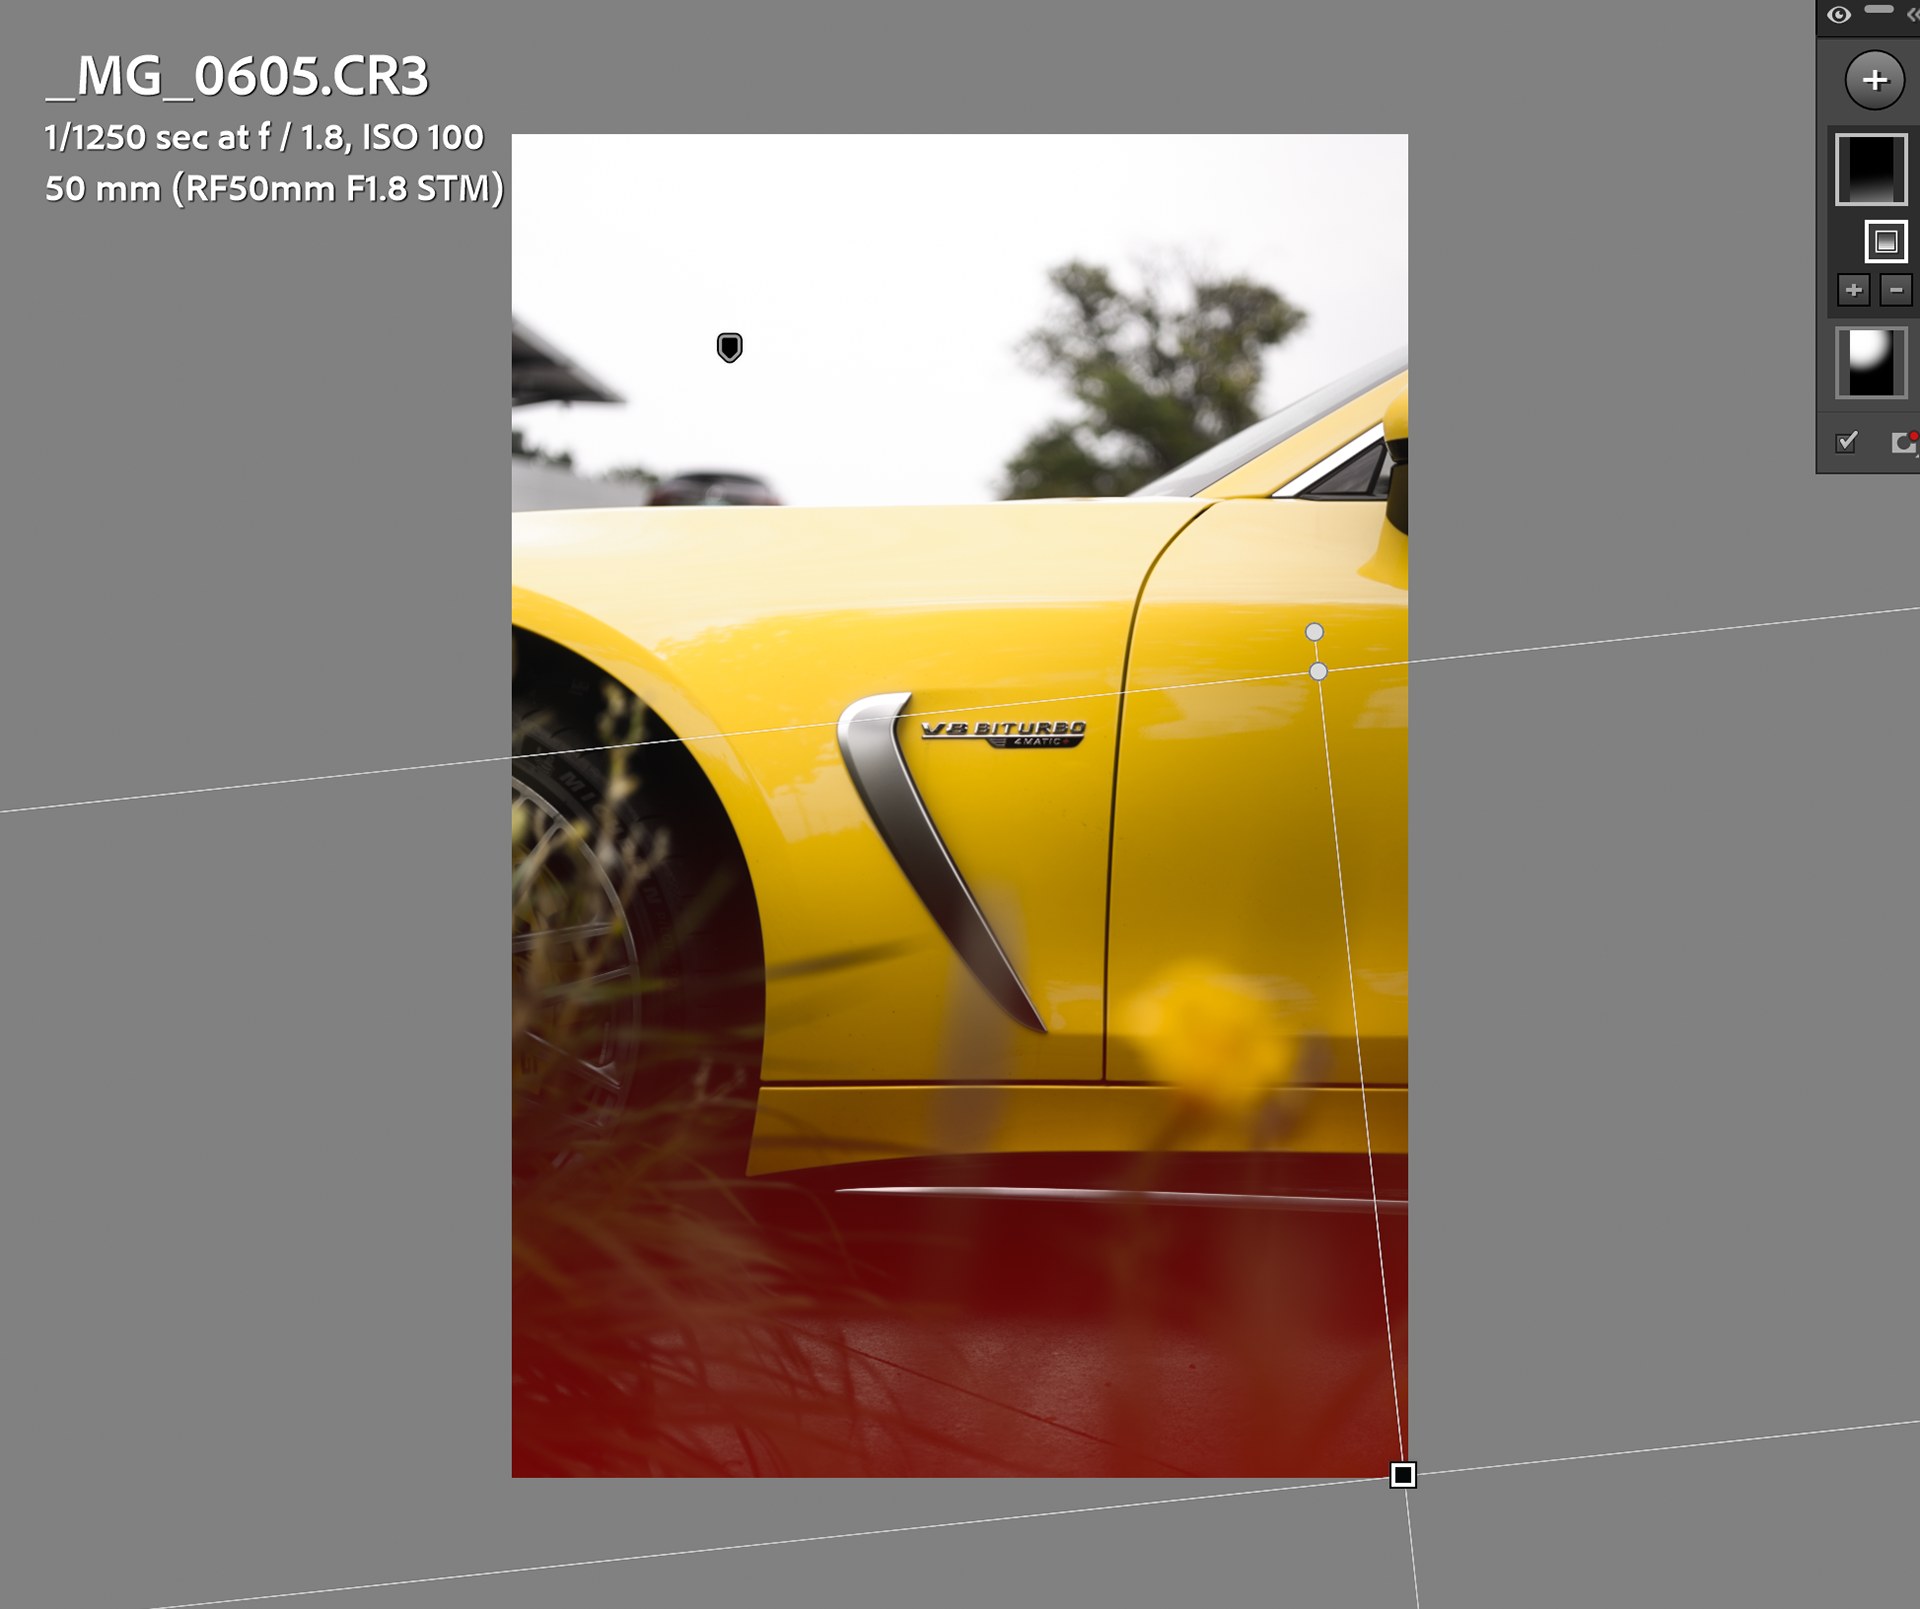
This image shows a Radial Gradient with a feather of 32. I use this in the sky as a highlight to add bloom emitting from the sky. The only adjustments made to this mask is a raising the exposure +0.74
This is the first of two masks.
This image is of a Linear Gradient I use on the bottom of the image for enhancing the shadows. The only adjustment made to this mask is lowering the exposure -2.21.
When I create these linear gradients, I will note that typically I select the origin point of the gradient, and drag it out while holding the ALT key, as this makes it a more gradual change.
SETTINGS NOTES
While it's not shown here. Other adjustments I might make are:
Texture/Clarity/Dehaze: I use these occasionally. If I do use them, I will raise the texture and clarity +10, and lower the dehaze -10. I've found this preserves detail while softening light. They're very subtle adjustments, but before my 1/4 pro mist lens filter, it gave a slight haze and bloom to the photos without damaging detail.
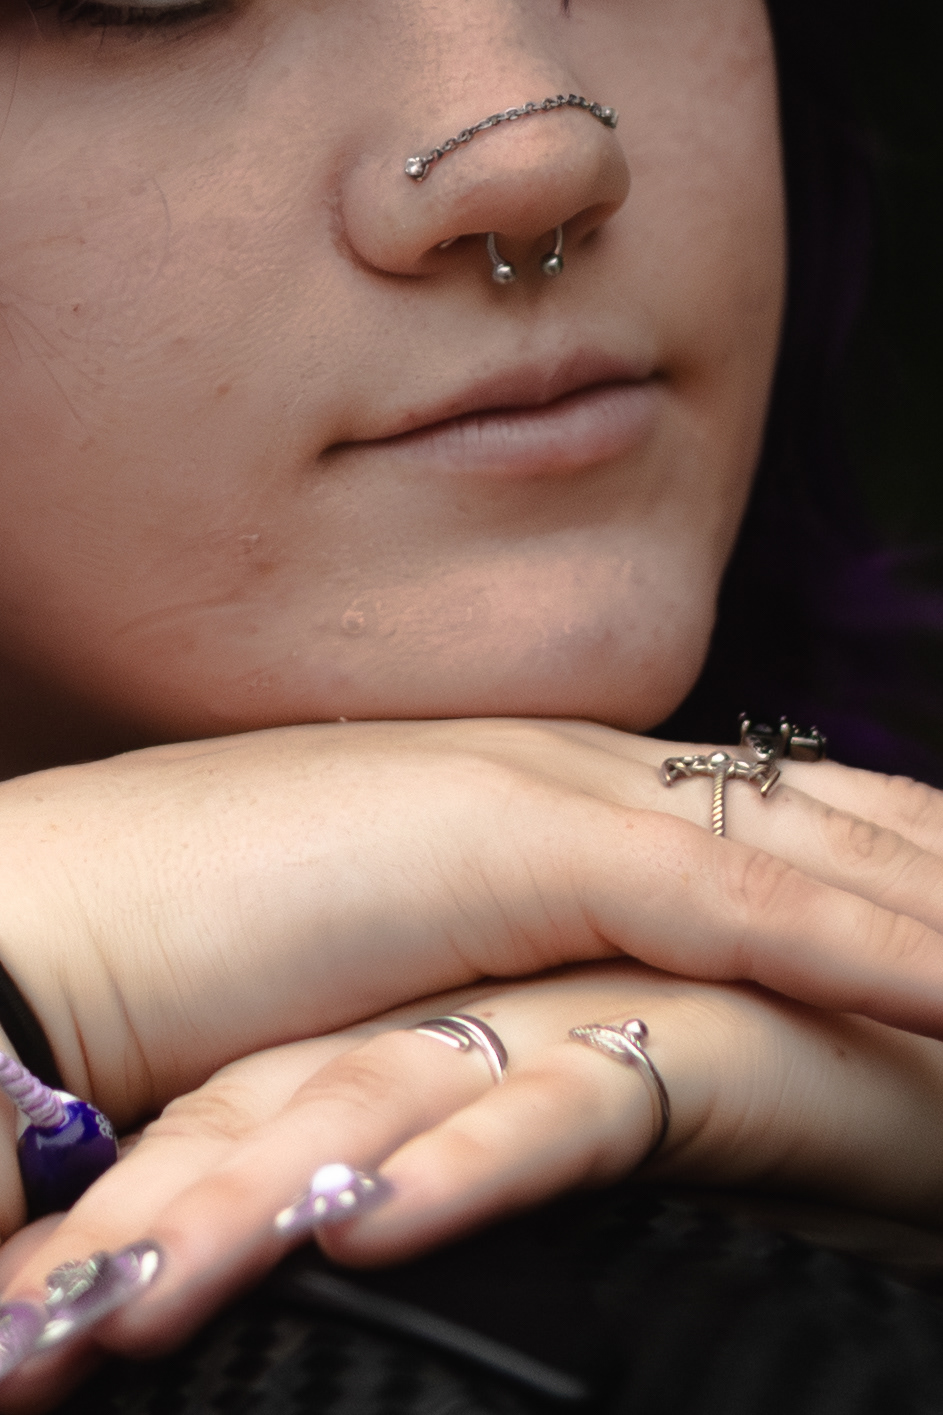
AI Denoise: My camera body is a Canon EOS R8. The usable ISO range on these is questionable. Typically if my ISO is 2000 or above, I will AI Denoise regardless.
LEFT is no denoise
RIGHT is with AI denoise

Want to see other guides, opinions or posts? Let me know!
Thank you!